Create a template from scratch with AI
Describe the document you need in plain words. The AI assistant drafts a complete, editable PDF template with data fields and sample data, and shows you a full preview before anything changes.
Overview
15–60 seconds
Typical time for one draft, depending on your provider and model.
Your own AI key
Requests go to the provider you choose and are billed to your key.
Nothing changes until you apply
Review first; press Ctrl+Z to undo afterwards.
One-time setup: connect your AI provider
The assistant uses your own AI account. You do this once.
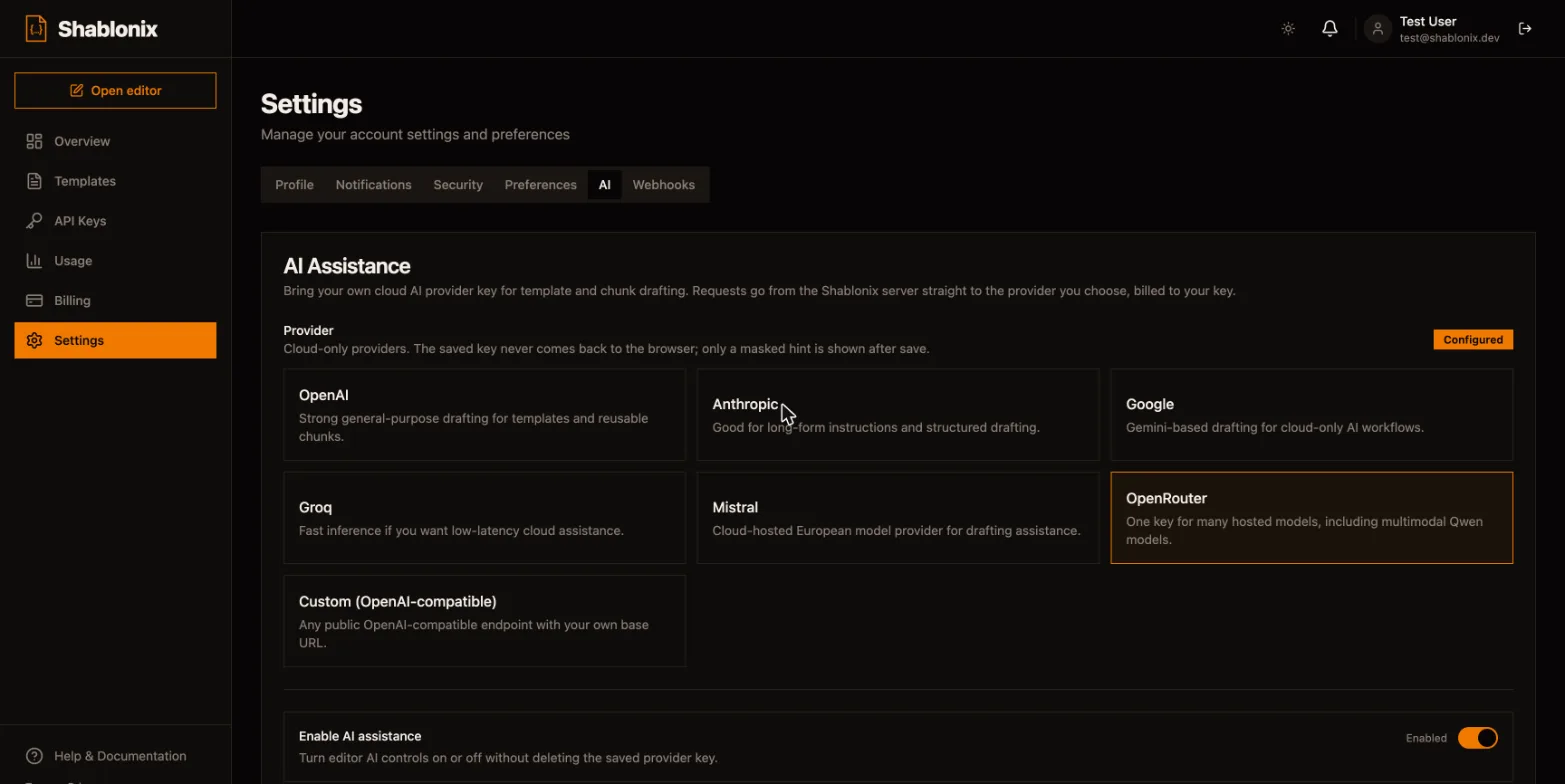
- In the dashboard, open Settings → AI.
- Pick a provider: OpenAI, Anthropic, Google, Groq, Mistral, OpenRouter, or any OpenAI-compatible service.
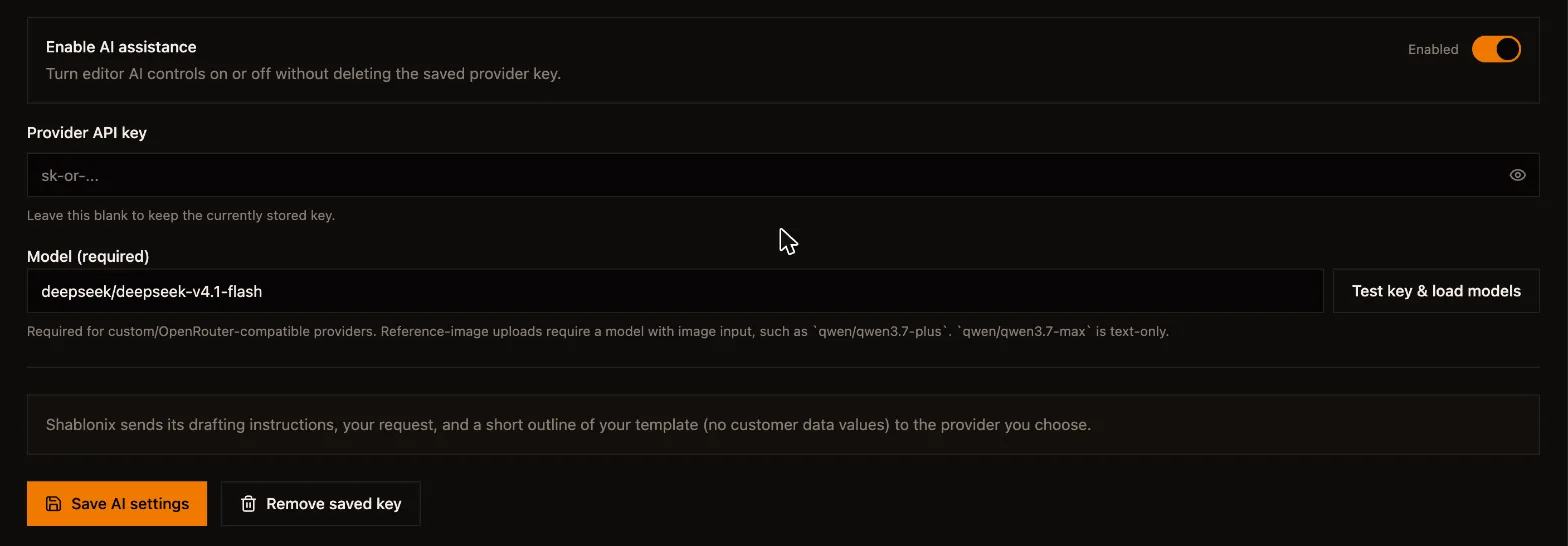
- Paste your API key, choose a model, and click Test key & load models to confirm the key works.
- Make sure Enable AI assistance is on, then click Save AI settings.
Matching a picture of an existing document
qwen/qwen3.7-plus. Text-only models work for everything else in this guide.1. Open the editor
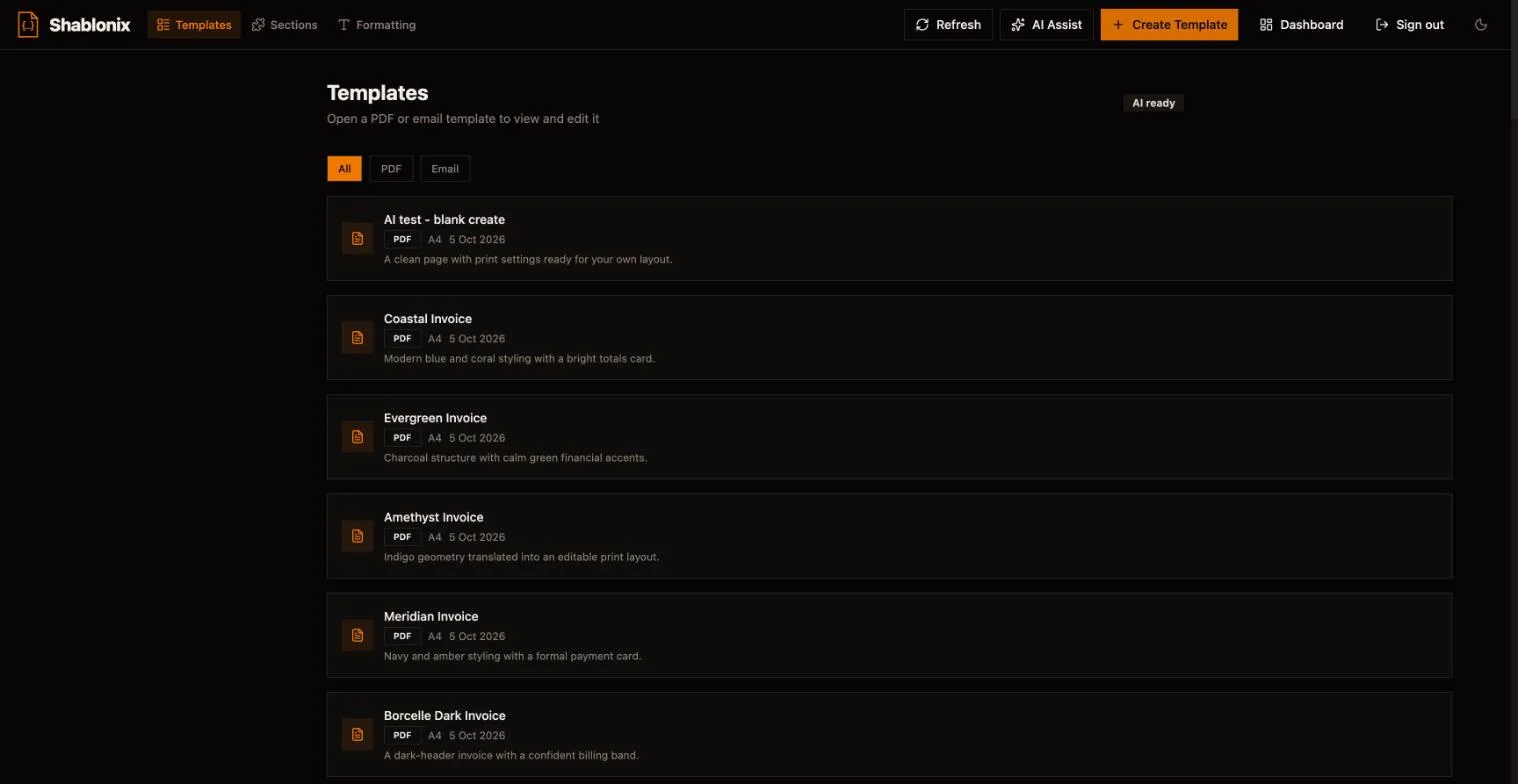
In the dashboard, click Open editor at the top of the left sidebar. You land on the editor's template list; the AI ready badge confirms the assistant is connected.
2. Create a blank template
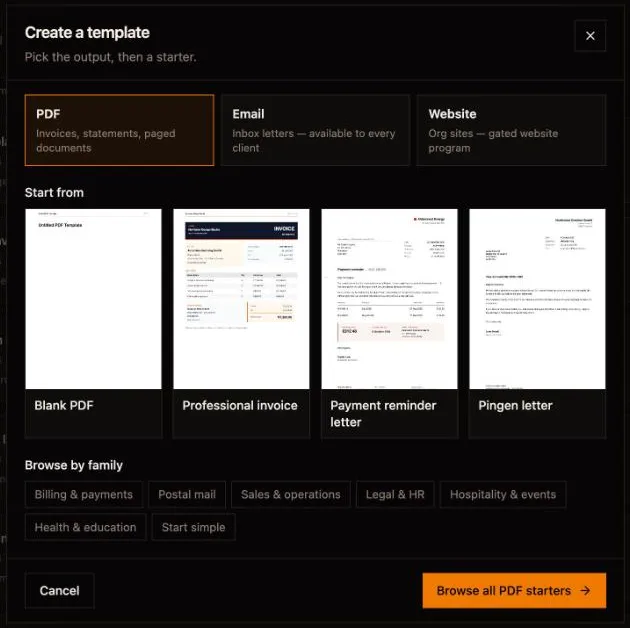
- Click Create Template, keep PDF selected and click Blank PDF.
- Give it a name you will recognise, such as Bakery invoice, check the paper size, and click Create PDF template.
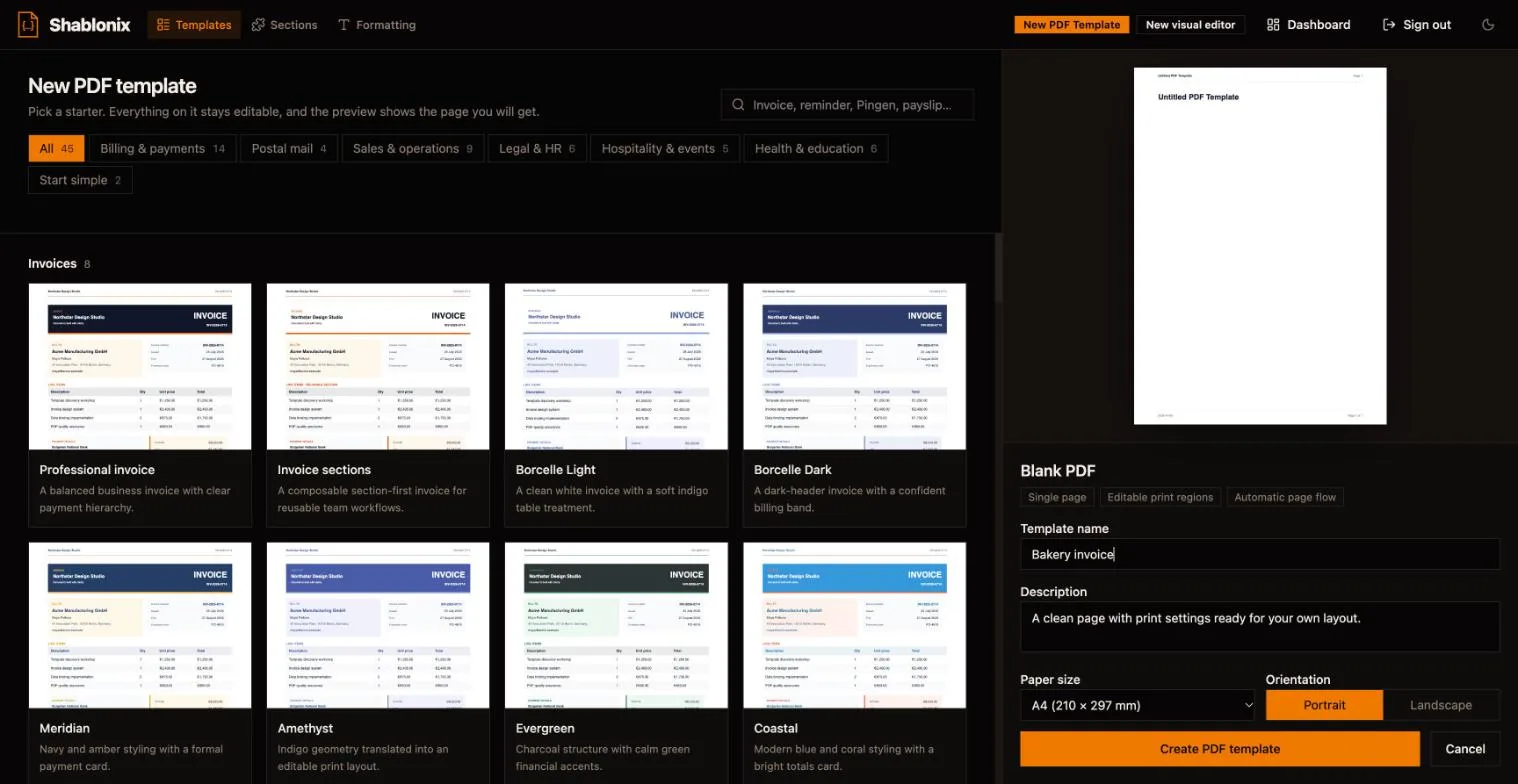
3. Open the AI assistant
The empty template opens in the editor. Click the sparkle button in the toolbar at the top right.
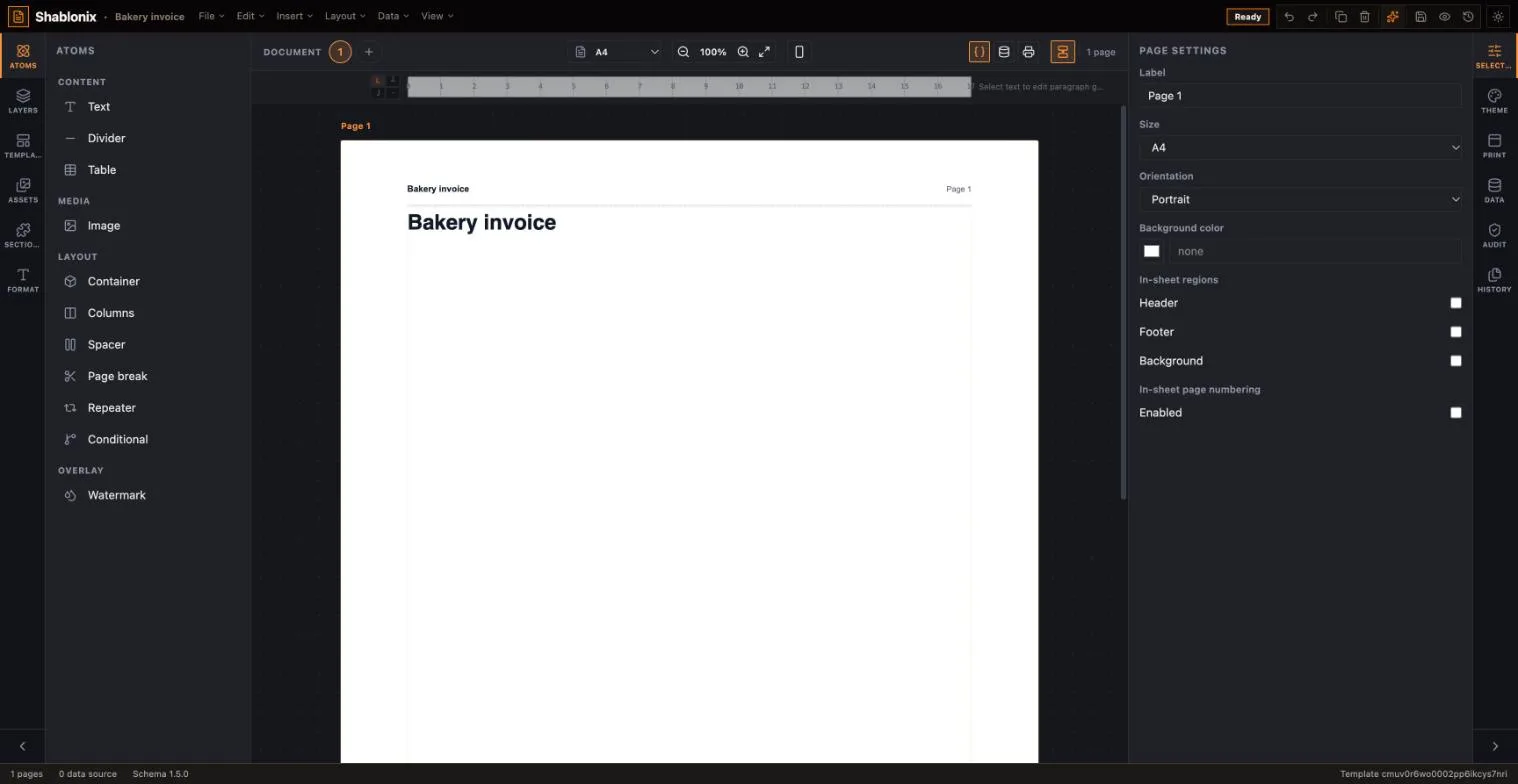

4. Choose “Start from scratch” and describe the template
On a blank template, Start from scratch is already selected and marked Recommended. Type what you need into Describe the template, or click one of the Try examples to start from a short idea. Describe the sections in order, the look, and your country and currency. This prompt produced the screenshots in this guide:
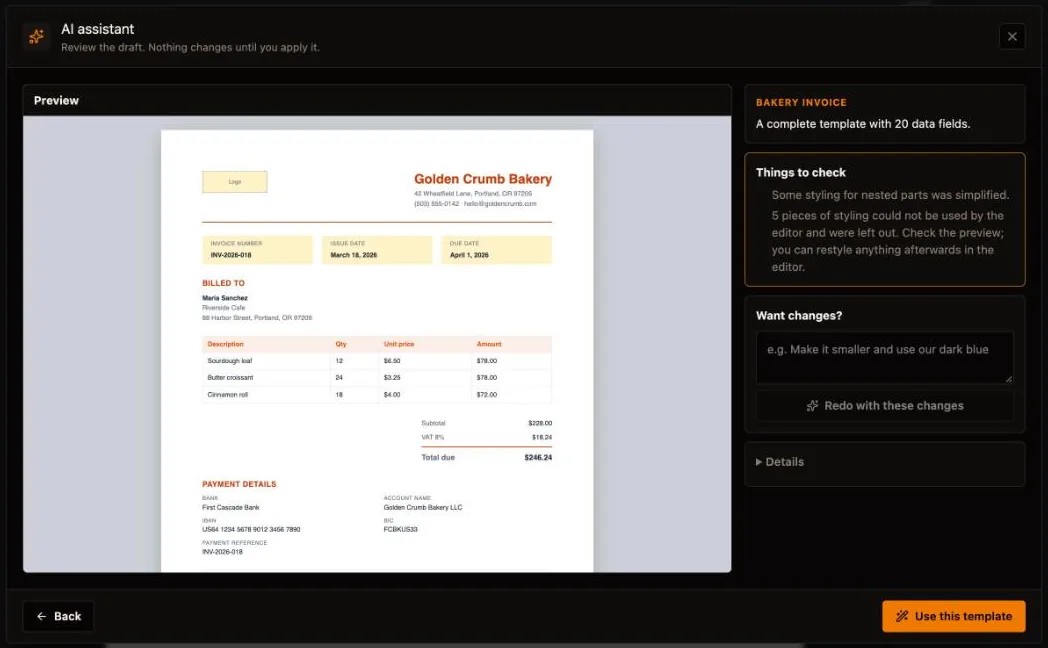
An invoice for Golden Crumb Bakery, a small family bakery. At the top: our logo on the left, and the bakery name, address, phone and email on the right. Then the invoice number, issue date and due date. Then 'Billed to' with the customer's name, company and address. A table of baked goods with description, quantity, unit price and amount, followed by subtotal, VAT 8% and total due. At the bottom: our bank details (bank, account name, IBAN, BIC, payment reference) and a short thank-you note. Warm and friendly: cream accents and a terracotta brown. Prices in US dollars.
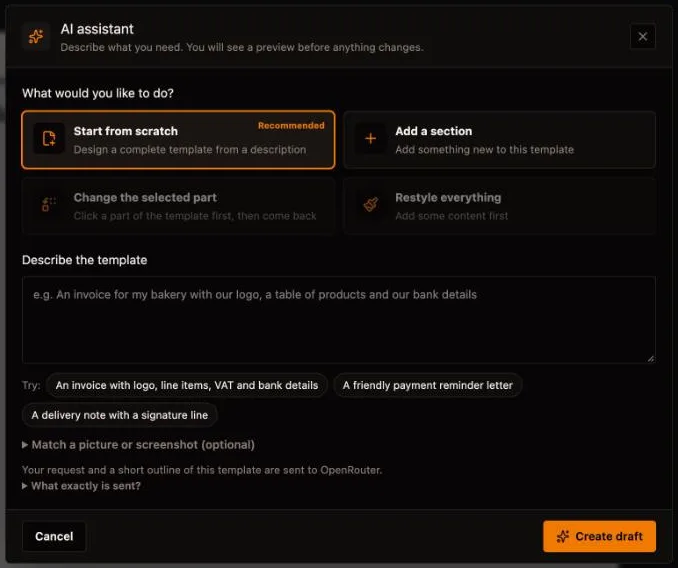
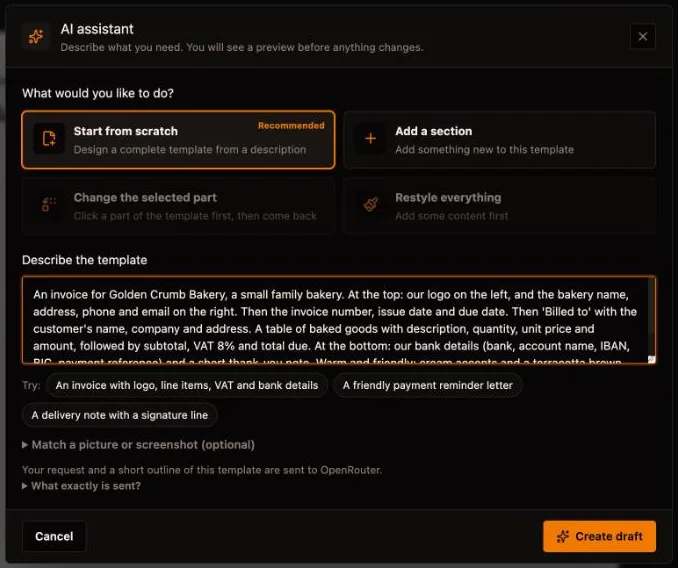
One line under the box names the provider your request goes to. What exactly is sent? explains it: your request and a short outline of the template, never your customers' data.
5. Wait for the draft
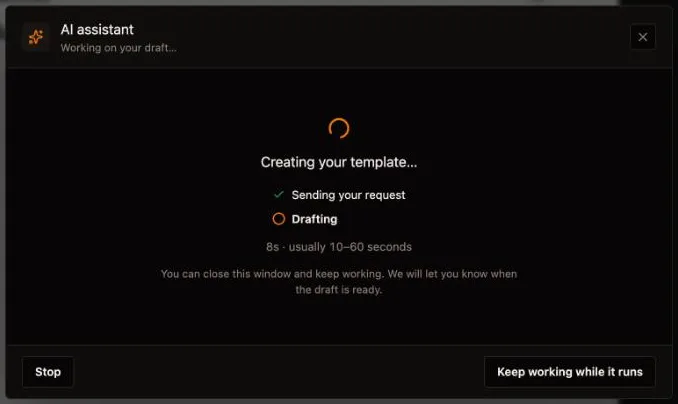
Click Create draft. A progress view shows each step and the elapsed time. When the assistant finds a problem in its own draft, it fixes it automatically and shows Checking the draft and fixing problems.
You don't have to wait in the dialog: click Keep working while it runs and carry on editing. A message with a Review button appears when the draft is ready. Stop cancels the request.
6. Review the draft
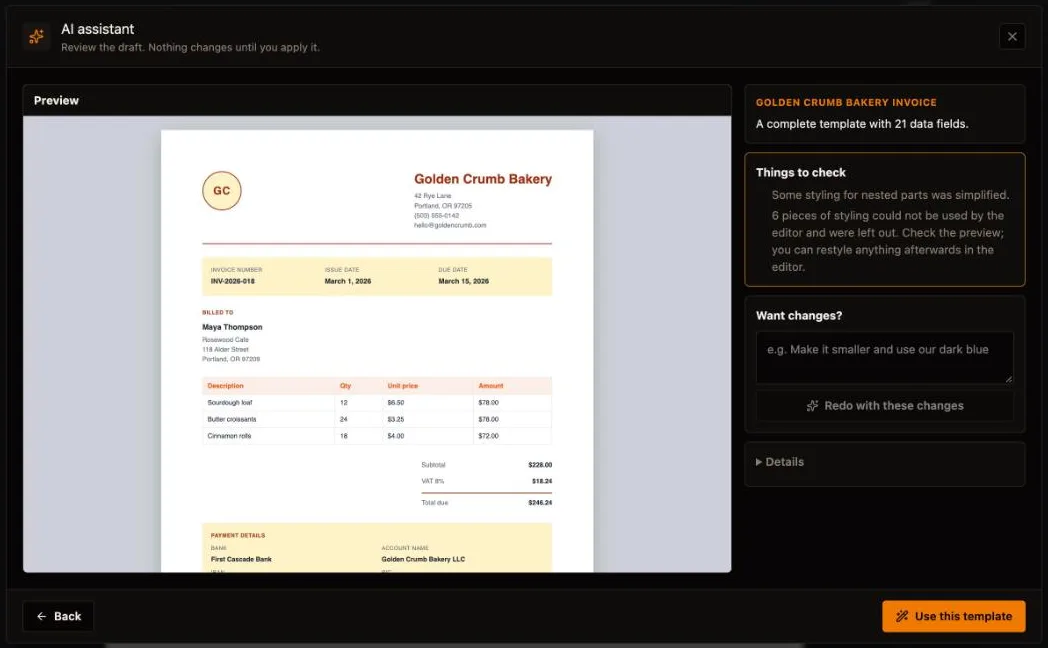
The review shows the whole page with realistic sample data. Nothing has changed in your template yet. On the right:
- +Summary: what the draft is and how many data fields it uses. Data fields are the parts that change per document, such as the customer name or invoice number.
- +Things to check: anything the editor had to simplify. Read it, then look at the preview.
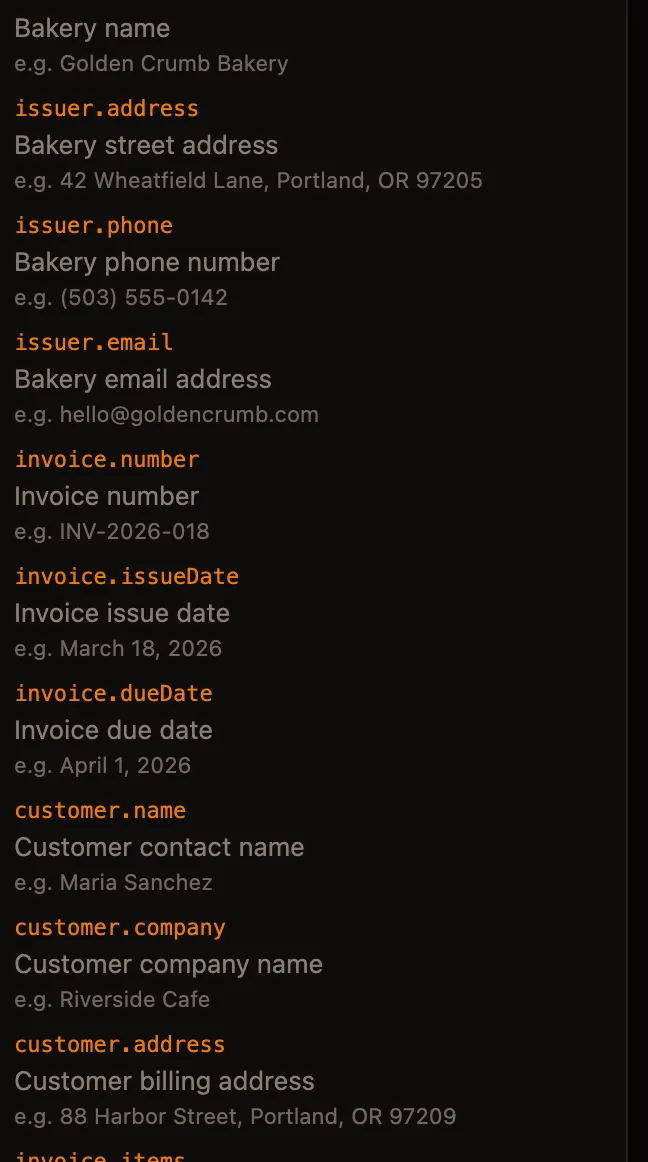
- +Details: every data field with its example value, and notes from the AI.
7. Ask for changes
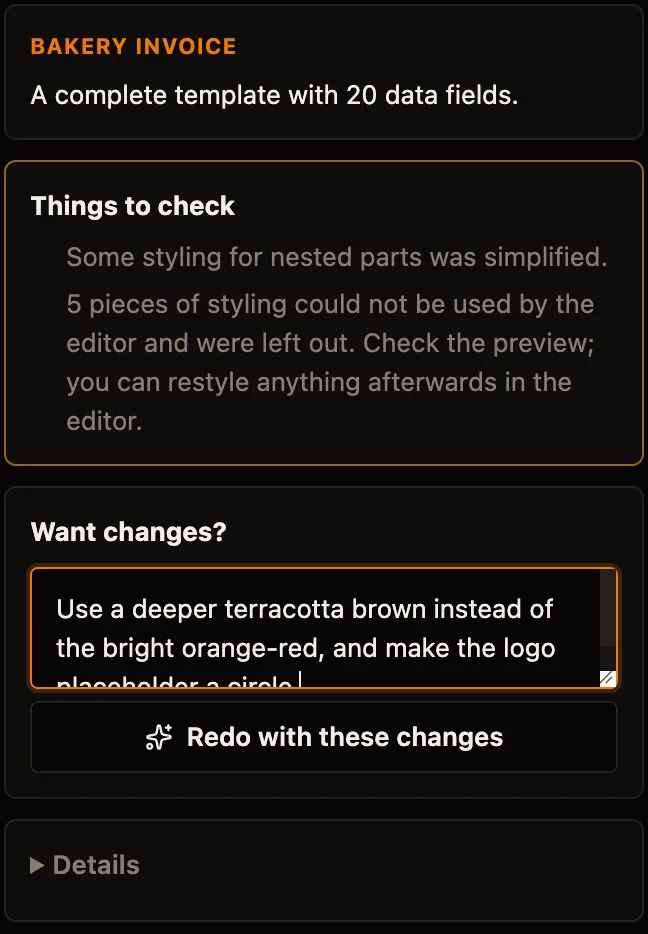
Not quite right? Type the change in Want changes? and click Redo with these changes. The assistant keeps your original description and applies the change on top. Here the first draft came out more orange than terracotta, and the logo was a plain box.
Use a deeper terracotta brown instead of the bright orange-red, and make the logo placeholder a circle.
8. Use the template
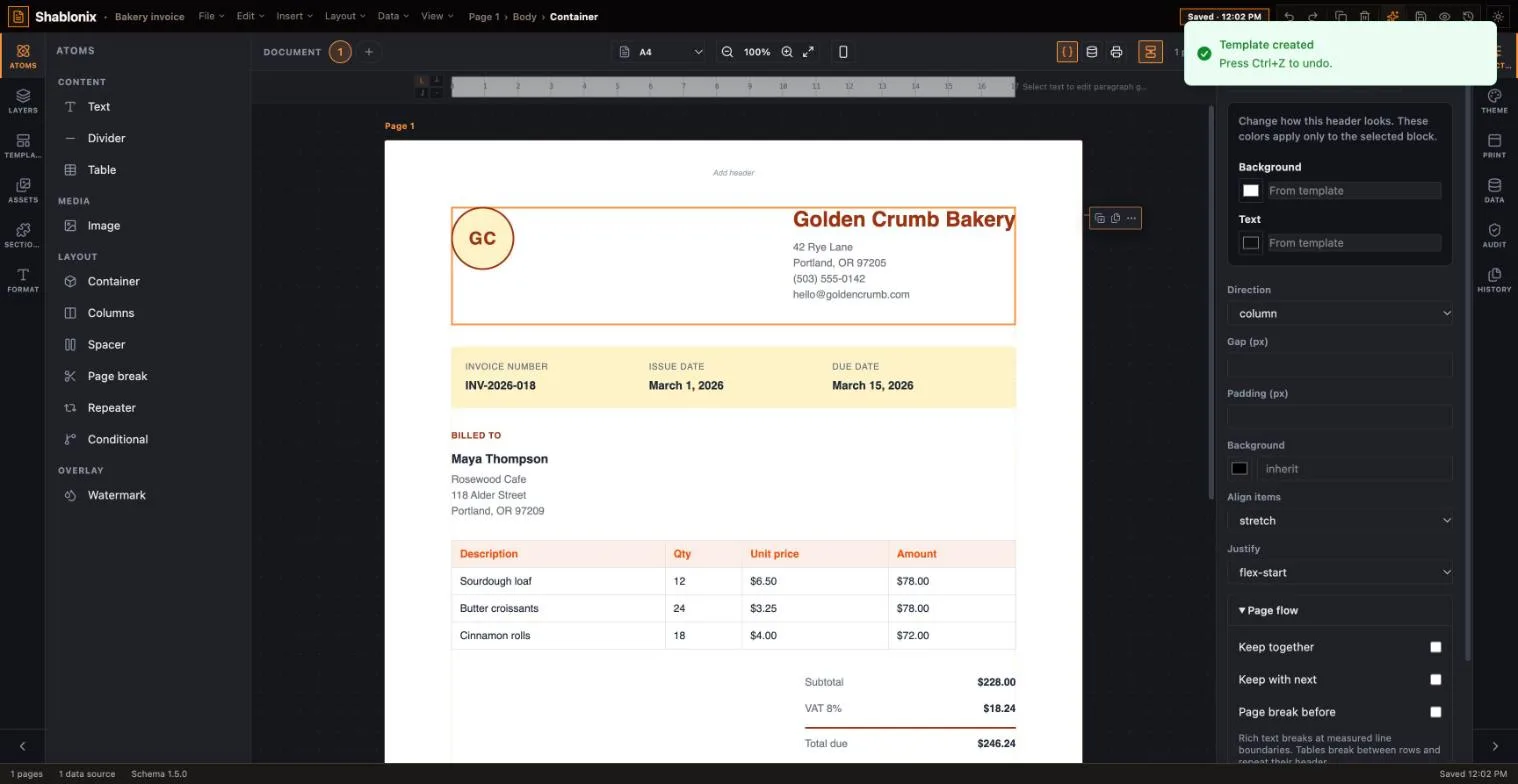
Click Use this template. The draft replaces the blank page and is saved, and a confirmation appears in the bottom-right corner. Everything is now normal, editable content: click any text, table or block to change it. Press Ctrl+Z to go back.
9. Check the PDF
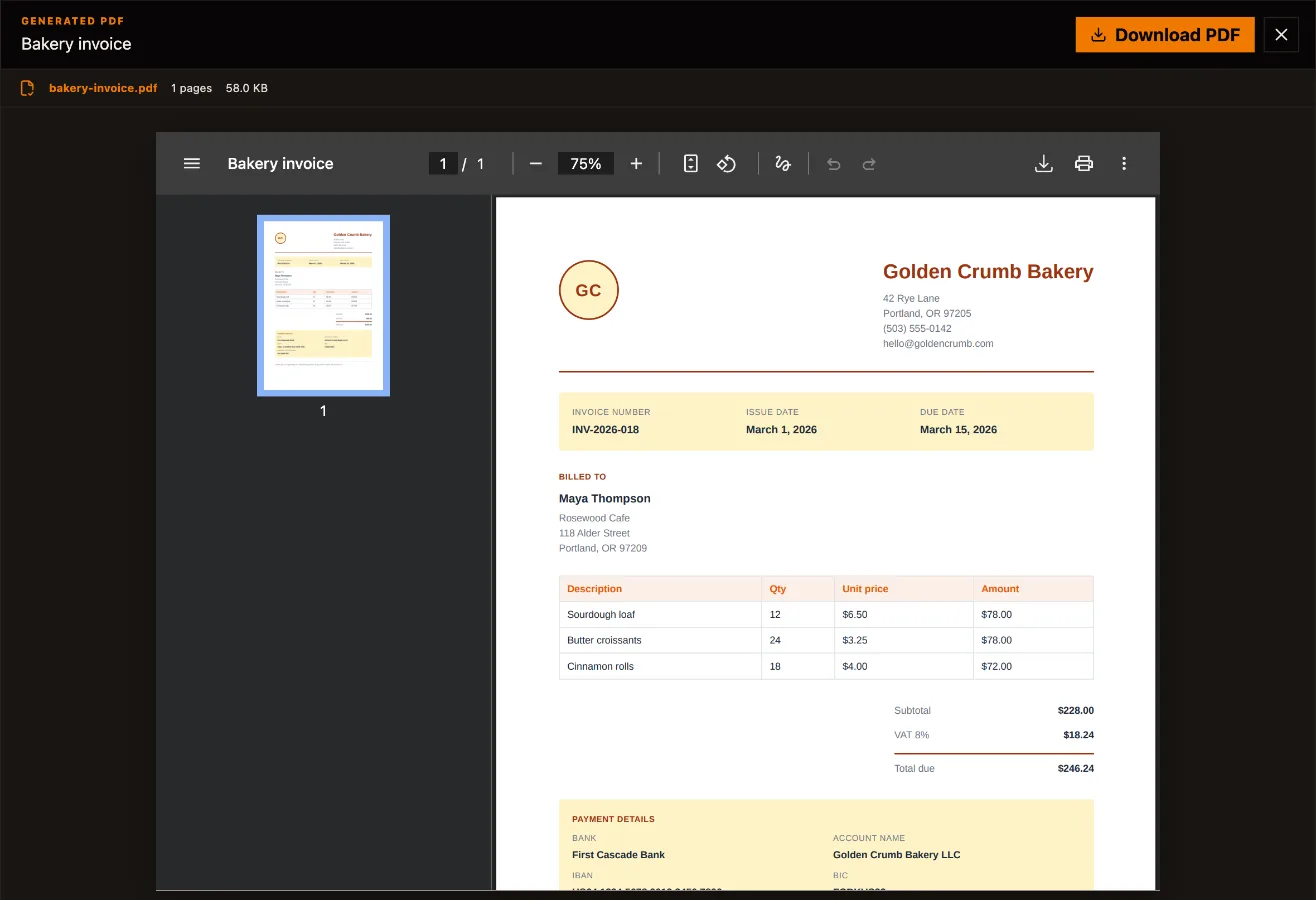
Click the eye button in the toolbar (Print preview) to generate a real PDF with the sample data. Use Download PDF to keep a copy.
Writing good prompts
Short prompts work, but the AI fills the gaps with its own guesses; a one-line prompt in our tests came back with British addresses and pounds. Cover these six things and the first draft is usually right:
What and for whom
“An invoice for a small family bakery.”
Sections in order
Top to bottom: header, parties, table, totals, footer.
What changes per document
Customer, items, dates. These become data fields.
The look
A mood and one or two colors: “calm, dark green”.
Language and country
Language, currency, date format, tax name (VAT, ДДС).
One document per request
Build an invoice and a reminder as two templates.
Colors are sometimes ignored on the first try
Tested examples
These runs were made on 5 October 2026 with OpenRouter and the model deepseek/deepseek-v4.1-flash. Times vary with your provider and model.
| Request | Time | Result |
|---|---|---|
| Bakery invoice (prompt above) | 27 s | Complete invoice, 20 data fields, one automatic fix |
| Change: terracotta and a round logo | 31 s | Colors and logo updated, 21 data fields |
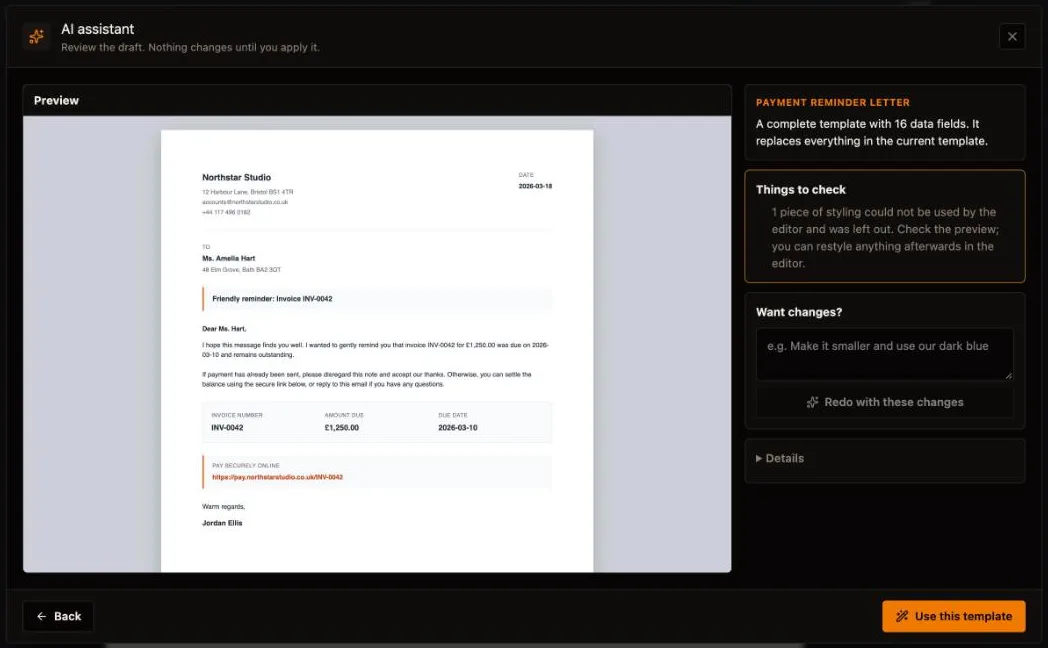
| “A friendly payment reminder letter” | 22 s | Full letter, 16 data fields; picked a UK address and pounds |
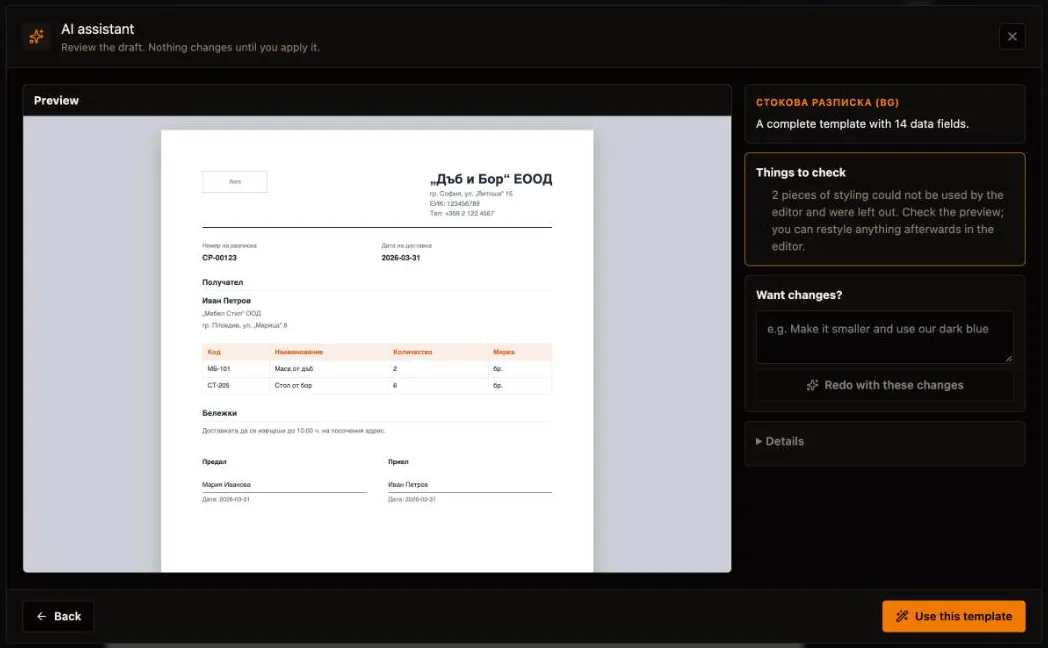
| Delivery note written in Bulgarian | 29 s | All text in Bulgarian, 14 data fields; orange instead of green |
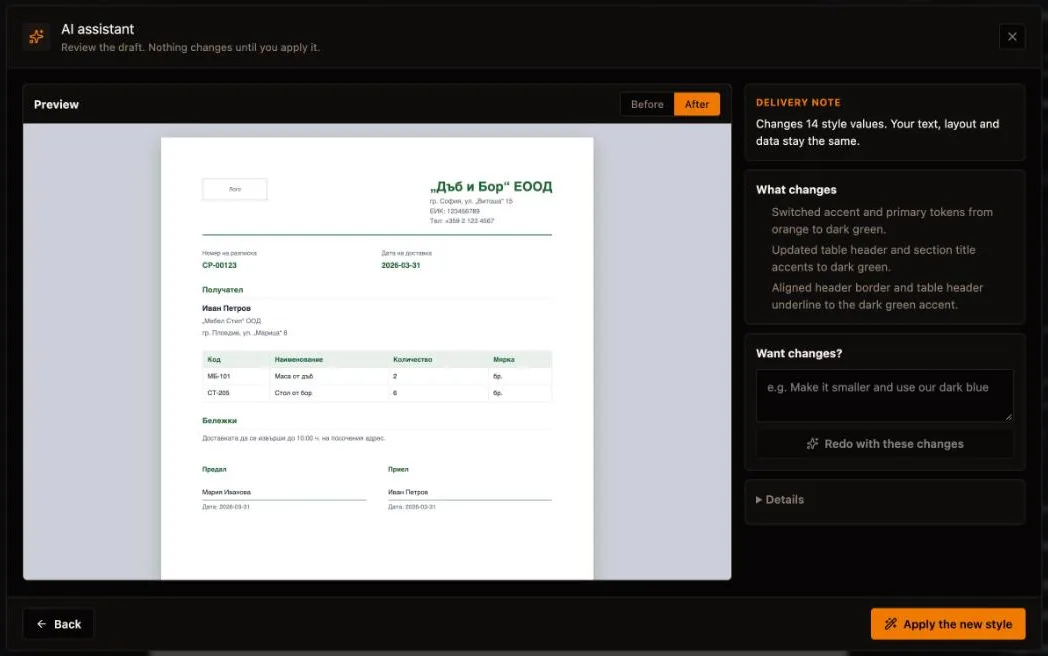
| Restyle: dark green accents | 7 s | 14 style changes, every accent green |
A one-line prompt
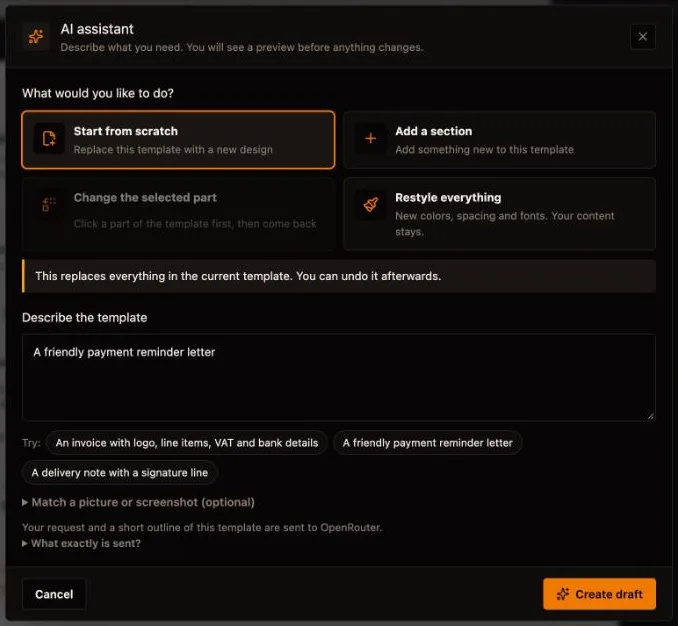
A friendly payment reminder letter
This ran on a template that already had content, so the assistant warned first: This replaces everything in the current template. You can undo it afterwards.
A document in another language
Write the prompt in the language you want the document in.
Стокова разписка на български език за мебелен магазин „Дъб и Бор“ ЕООД в София. Горе: лого вляво; име на фирмата, адрес, ЕИК и телефон вдясно. После номер на разписката и дата на доставка. Блок „Получател“ с име, фирма и адрес за доставка. Таблица с артикули: код, наименование, количество и мярка. Отдолу бележки за доставката и два реда за подпис – „Предал“ и „Приел“, с дата. Изчистен, професионален вид в тъмнозелено.
Fixing the colors with “Restyle everything”
Use dark green instead of orange for all accents, including the table header.
After the first draft
Open the assistant again at any time. Once the template has content, the other choices are available:
- +Add a section: describe it and pick where it goes with Place it, for example After “Bank details”. The preview outlines the new part in orange.
- +Change the selected part: click a block in the template first, then open the assistant and describe the change.
- +Restyle everything: new colors, spacing and fonts; your text and data stay as they are.
Troubleshooting
Clicking the sparkle opens “Set up AI assistance”
No AI key is saved, or AI is switched off. Click Open AI settings, finish the one-time setup, then return to the editor tab; the assistant opens by itself.
“Change the selected part” is greyed out
Nothing is selected. Close the assistant, click the block you want to change, and open it again.
“Things to check” says some styling was left out
The editor dropped a few styles it cannot keep editable. If the preview looks right, use the template and adjust anything afterwards in the editor or with Restyle everything.
“The AI could not suggest usable style changes”
Describe the look in different words, for example by naming the colors. If it keeps happening, try another model in Settings → AI.
A draft takes more than a minute
Click Keep working while it runs. If nothing arrives after a few minutes, the provider may be slow; stop and try again, or choose a faster model.
A picture is rejected
Your model cannot read images. Pick a model with image input in Settings → AI, or describe the layout in words.
I want the previous version back
Press Ctrl+Z right after applying, or open Version history in the toolbar. Every AI change saves a restore point first.